
When it comes to smoking a brisket, temperature is a crucial variable that can greatly affect the final outcome. While many barbecue enthusiasts aim for higher temperatures, there’s a growing interest in slow-cooking brisket at 200°F.
This method presents its own set of challenges and rewards, offering a different yet delicious take on this classic dish.
In this article, we’ll explore the various factors that come into play when smoking a brisket at 200°F, from the time required to the impact on flavor and texture. Keep reading to discover how to achieve mouth-watering results with this low-and-slow approach.
How Long To Smoke A Brisket At 200?
The time it takes to smoke a brisket at 200°F can vary depending on several factors such as the size of the brisket, the type of smoker you’re using, and even the weather conditions. However, a general guideline is that it could take around 1.5 to 2 hours per pound of meat. For example, a 10-pound brisket could take anywhere from 15 to 20 hours to fully cook at this temperature.
It’s important to note that smoking at such a low temperature will produce a very tender, juicy brisket, but it also increases the risk of the meat drying out if not monitored carefully. It’s advisable to use a meat thermometer to regularly check the internal temperature of the brisket. Most pitmasters aim for an internal temperature of around 195-205°F to ensure the brisket is cooked to perfection.
Remember, these are general guidelines and it’s always best to use your judgment and experience when smoking meat. Keep an eye on the brisket and make adjustments as needed to achieve the desired results.
Smoking Brisket at 200 Degrees
Smoking a brisket at 200°F is a low-and-slow approach that comes with its own set of pros and cons. On the positive side, this method has the potential to produce a brisket that’s incredibly tender and flavorful. Cooking at this lower temperature allows the collagen within the meat to break down more thoroughly, resulting in a final product that’s juicy and easy to pull apart.
Factors to Consider
- Time: As mentioned earlier, this method requires a commitment of time. Expect to smoke your brisket for approximately 1.5 to 2 hours per pound.
- Meat Quality: Since the cooking process is so long, starting with a high-quality cut of meat is even more critical. Look for a brisket with good marbling.
- Temperature Monitoring: Keeping a constant temperature is crucial for the success of this method. Make sure to use a reliable smoker and consider using a digital meat thermometer to regularly check both the smoker’s temperature and the internal temperature of the brisket.
- Moisture: Because the meat will be cooking for an extended period, it’s advisable to keep a water pan in the smoker to maintain humidity, or to mop the brisket occasionally to prevent it from drying out.
- Wood Choice: Since the brisket will be absorbing smoke for a longer period, choose a wood that’s not overly strong. Woods like apple or cherry can impart a milder, sweeter smoke flavor.
- Safety: It’s essential to ensure that the brisket reaches a safe internal temperature. The target is usually between 195-205°F, at which point the meat is both safe to eat and should be at its peak tenderness.
Benefits & drawback
Smoking a brisket at 200°F has a distinct set of advantages and disadvantages that can affect the quality of your final product. Here’s a closer look:
Pros
- Tenderness: Cooking at 200°F for an extended period allows the collagen in the meat to break down more thoroughly. This results in a brisket that’s exceptionally tender and can be easily pulled apart with a fork.
- Flavor Depth: The low and slow process gives the meat ample time to absorb the smoke, thereby enhancing its flavor profile. This creates a rich, complex taste that is hard to achieve through quicker cooking methods.
- Moisture Retention: Provided it’s done correctly, low-temperature smoking can result in a juicier brisket. The extended cooking time at a low temperature can allow the meat to retain more of its natural juices.
- Less Risk of Overcooking: The lower temperature provides a wider window for perfect doneness, reducing the chances that you’ll end up with overcooked, dry meat.
- Consistency: When maintaining a stable temperature, the cooking environment is more controlled, resulting in a more evenly cooked brisket.
Cons
- Time–Consuming: One of the most evident drawbacks is the amount of time required. A 10-pound brisket could take up to 20 hours to cook, which is a significant time investment.
- Risk of Drying Out: Because of the long cooking time, there’s an increased risk that the meat could dry out, especially if it’s not monitored closely.
- Energy Inefficiency: Running a smoker for 15-20 hours can consume a lot of fuel, whether it’s charcoal, wood, or electricity. This makes the cooking process less energy-efficient and potentially more expensive.
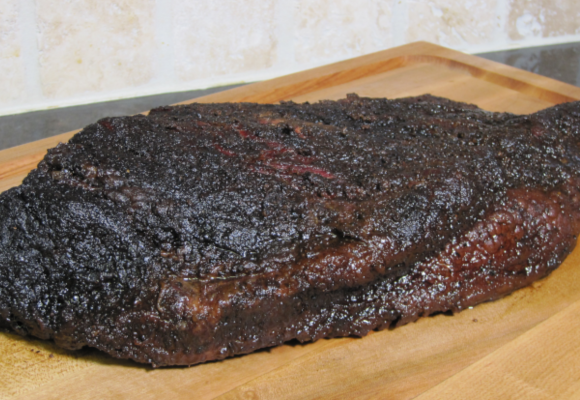
- Tough Exterior: Sometimes, the low temperature can result in a less crispy bark (the outer layer of the brisket), which some people find undesirable.
- Safety Concerns: Meat needs to reach a certain internal temperature to be considered safe to eat. In some cases, cooking at 200°F might not be sufficient to quickly get the meat up to the recommended safe internal temperature of 195-205°F, posing a food safety risk.
Smoking Brisket at 200 Degrees: Following Are the Steps
If you’re interested in smoking a brisket at 200°F, a thorough step-by-step guide can be helpful. This approach requires time and attention to detail but can yield incredible results when executed properly.
Step 1: Selecting Your Brisket
When it comes to selecting your brisket, quality is key. You’ll often find two main parts in a full brisket: the flat and the point. The flat is leaner, while the point has more fat. Many prefer a full packer brisket, which includes both parts, as it offers a good balance of fat and meat. Look for a brisket that has a deep red color and good marbling, or streaks of fat throughout.
This marbling is essential for flavor and will help keep the meat juicy during the extended cooking time. Additionally, aim for a cut that’s been minimally processed with no added solutions or tenderizers.
Always buy from a reputable source, and don’t shy away from asking the butcher for recommendations. Weigh your brisket, as this will be crucial for determining your cooking time—expect approximately 1.5 to 2 hours per pound.
Step 2: Prepping the Meat
Preparing the meat is a significant step in the smoking process. Start by trimming off the excess fat; aim to leave about a quarter-inch layer. Excessive fat can prevent the smoke from penetrating into the meat, thereby reducing flavor.
After trimming, it’s time for the dry rub. Although preferences for dry rubs can vary, a basic mixture usually includes elements like salt, pepper, garlic powder, and onion powder.
Feel free to add other spices that suit your taste, like paprika for color and heat, or brown sugar for sweetness. Apply the dry rub generously, ensuring it adheres well to the meat.
Some even prefer to let the seasoned brisket sit in the refrigerator overnight to let the flavors meld. Remember, this is a long cook, so the seasoning needs to hold up for an extended period.
Step 3: Preheat the Smoker
Before placing your brisket in the smoker, you’ll need to preheat it to a stable 200°F. If you’re using a charcoal smoker, this might require more effort to maintain a consistent temperature. You may need to adjust the vents and periodically add more charcoal.
For electric and gas smokers, set the temperature and allow ample time for the smoker to reach it. It’s advisable to use multiple thermometers to confirm the smoker is at a consistent temperature throughout.
Keep in mind that opening the smoker frequently can result in temperature fluctuations, so try to minimize this. Preheating ensures that you’re starting the cooking process at the desired temperature, reducing the chances of undercooking the brisket.
Step 4: Add Water Pan and Wood
Once the smoker is preheated, place a water pan inside it to maintain internal humidity. This is especially critical for long smokes at low temperatures to prevent the meat from drying out. Some people use apple juice or beer in the water pan for additional flavor.
For the wood, since the brisket will be in the smoker for a long time, it’s advisable to opt for milder woods.
Apple, cherry, and pecan are good choices, as they don’t overpower the meat’s natural flavors. If you’re using wood chips, you’ll need to add more periodically to maintain the smoke level. For wood chunks, they generally last longer, so fewer additions would be needed.
Step 5: Place the Brisket in the Smoker
With your smoker at a stable 200°F, it’s time to introduce the brisket to its smoky cooking environment. Place it fat side up to allow the melting fat to moisten the meat. Insert a good quality meat thermometer probe into the thickest part of the brisket, avoiding any fat, as that can give false readings.
Position the brisket in the middle of the smoker rack to ensure even cooking. Some pitmasters recommend placing a drip pan below the brisket to catch drippings, which can later be used for making a sauce or gravy.
Close the smoker lid or door and aim to keep it closed as much as possible to maintain temperature and smoke levels. Now begins the long, patient process of low and slow cooking.
Step 6: Monitor and Maintain
The monitoring phase is crucial, particularly given the long cook time at a low temperature. Use a digital thermometer with remote monitoring if possible, to keep tabs on both the smoker’s temperature and the meat’s internal temperature.
For those using charcoal or wood smokers, this stage can be quite hands-on, requiring you to add fuel and adjust vents to maintain a constant 200°F.
During this period, you may also choose to mop the brisket. Use a mixture of apple cider vinegar and water to keep the surface moist. Do this sparingly to minimize the time the smoker is open, thus preventing temperature fluctuations.
Step 7: Check for Doneness
As you near the estimated cooking time, it’s essential to start checking for doneness. Your target internal temperature for the brisket should be between 195°F and 205°F.
Don’t solely rely on time estimates; always use a meat thermometer to verify. When the brisket reaches this temperature range, it’s not only safe to eat but should also be at its peak tenderness.
A common method to test for doneness is the “poke test,” where the meat should yield easily to a probe in multiple places. If you’re aiming for slices, it’s better to keep the brisket on the lower end of the temperature range, while those who prefer a more shredded texture can aim for the higher end.
Step 8: Rest the Meat
The resting phase is often underestimated but is vital for optimal results. After reaching the target internal temperature, remove the brisket from the smoker and wrap it in either butcher paper or aluminum foil. Let it rest for at least an hour.
This resting period allows the juices to redistribute throughout the meat, ensuring each slice is moist and flavorful. Some even prefer to place the wrapped brisket in a cooler (without ice) to prolong the resting period, which can further improve texture and flavor. Remember, a well-rested brisket is easier to slice and tastes better.
Step 9: Slice and Serve
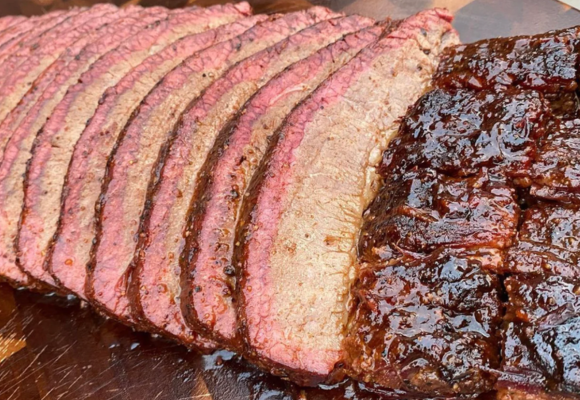
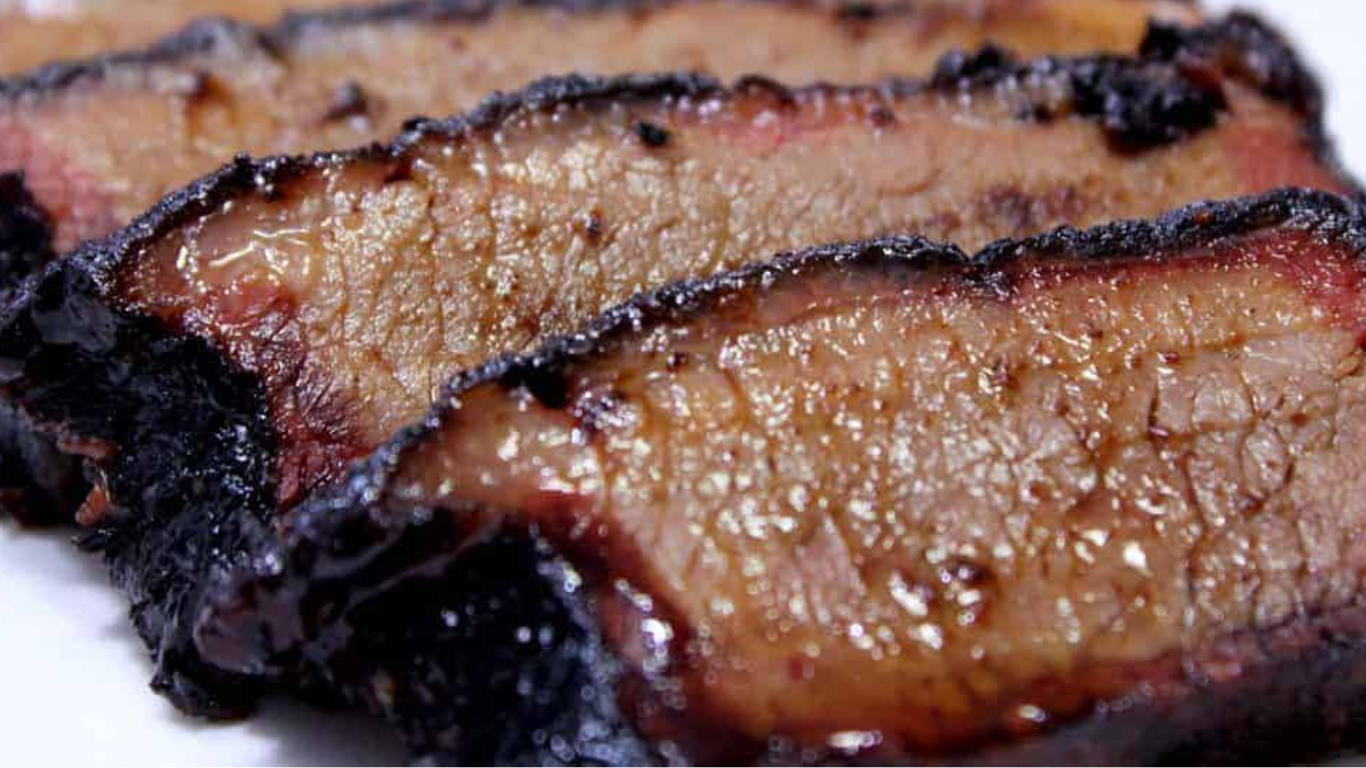
Finally, the moment you’ve been waiting for—slicing and enjoying your smoked brisket. Use a sharp knife and cut against the grain for the most tender slices.
The grain typically runs differently in the flat and the point, so you might need to adjust your slicing direction when you transition from one to the other.

Thickness depends on personal preference, but a general guideline is about pencil-thick slices for the flat and thicker slices or chunks for the point. Serve immediately, as brisket is best enjoyed fresh off the smoker.
Accompany traditional sides like coleslaw, baked beans, or cornbread, and don’t forget to offer a selection of barbecue sauces for those who like a little extra kick.
Through these comprehensive steps, you can produce a smoked brisket at 200°F that is both flavorful and tender. This process demands dedication and meticulous attention to detail, but the end result can be truly rewarding.